For a while after I thought of this blog, I was going to give up. I was adding up the parts cost, and it looked like I was going to have to spend $200 or just to get started. Too expensive for a hobby I thought(ok, you with the dual mono-block Jadis amplifier, stop snickering!) Then three things happened all together.
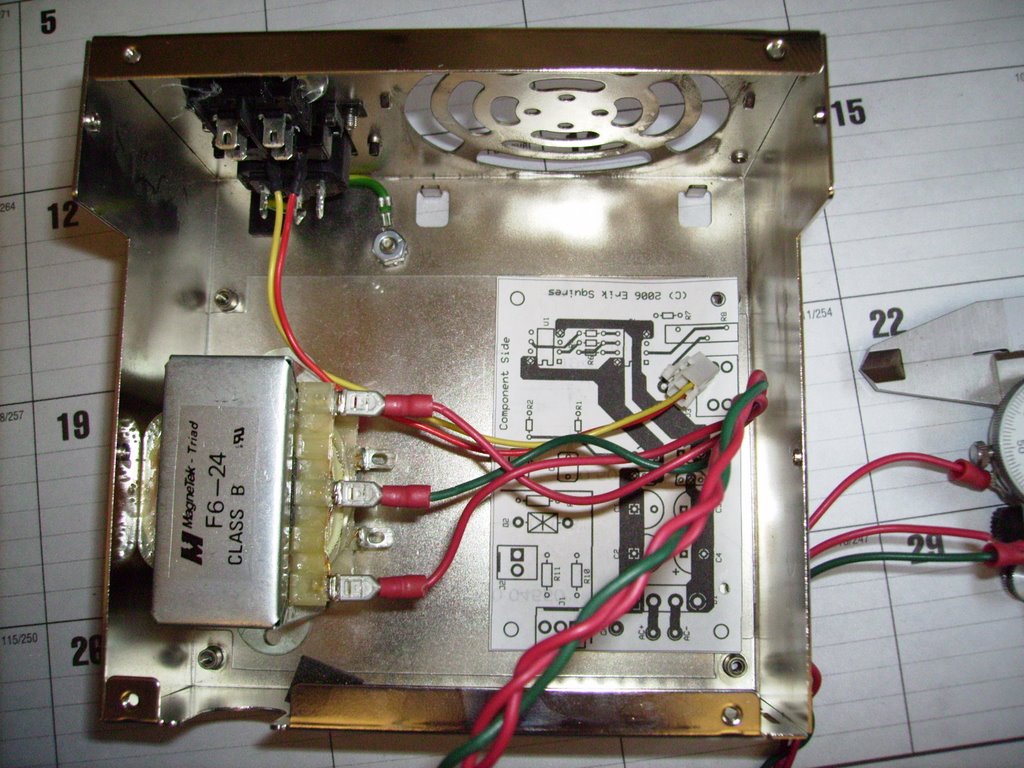 First, I found that many of my needs would be served by this mini-PC power supply. I found it headed to the trash in the building I work at. It was a gold mine in disguise for the thrifty minded solder monkey that I am becoming. It included a grounded case, IEC electrical receptacle, DPST power switch, a 115/240 V switch which could be repurposed to become a balanced/unbalanced switch (more on this later), some existing fasterners for the circuit board, some jumpers and a bridge rectifier and even a plastic sheet on the bottom to lessen the chances of shorting something by accident. The paper you see in the bottom of the case is an ink-jet paper puppet of the future circuit board. By printing the top layer of the circuit board actual size, I can make sure that everything is in the right place before I get the board itself manufactured. You will also notice the heart of my power suppply, a 5 amp center tapped, 30 volt transformer, which will fit nicely in the corner.
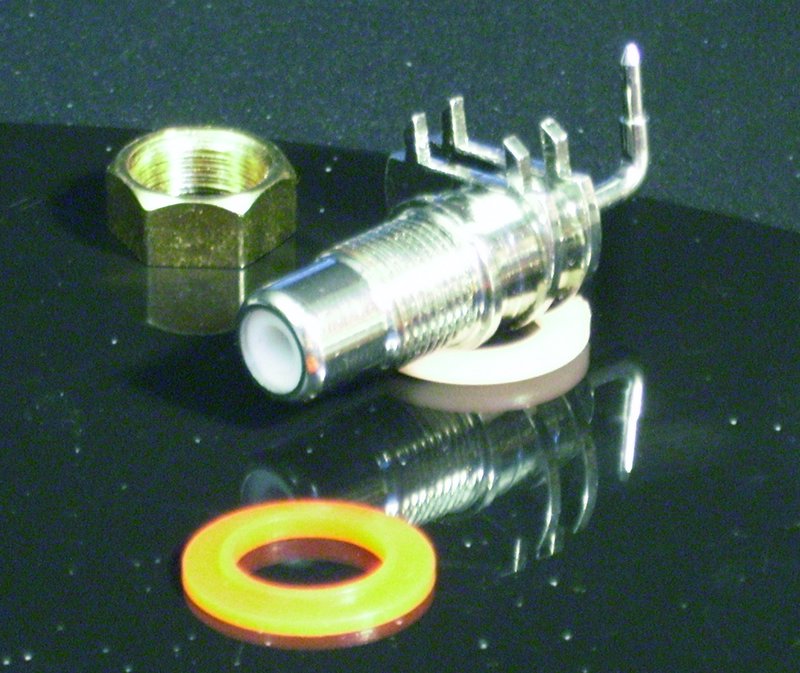 The second thing that happened is that this juicy bit-o-kit arrived in the mail, free of charge. Recognize it? It's a Cardas GRFA PRT printed circuit board (PCB) mountable female RCA plug. Usually around $20-$30 each. So, in a way, I had sponsorship. This doesn't mean that Cardas has in any way aproved of my blog, but now I feel obligated to use it, or pay for it. So, now a word about my sponsor. This is the sweetest RCA connector I've ever seen, or felt. The RCA plug sliding into it is absolutely butter smooth, but, the footprint is HUGE! I mean, it's great if you are making a high-end preamp, with a large circuit board and you are already putting in 0.1 uF capacitors the size of a cat's head, but in order to get the prototype discount I have to use a board that is exactly 3.8" x 2.5". This beast is literally the size of most the buffer circuit I am using. Fortunately most of it hangs off the circuit board, but still, it's huge. If you want to use these for production you will have to use tight tolerances between your boards and the case. The space between the ground pins and the start of the threads is only about .150 inches. If you are using round holes, your spacing drops rapidly. So, I can see why the case mounted versions are more popular with DIY'ers. The case mounted versions are just as good, and easier to manage. Leave these to the manufacturers paying the megabucks for the gold plated boards, and +-0.001" case manufacturing.
As an aside, the guys at HeadRoom managed to stick 3 double sockets plus a single in the back of Desktop Headphone Amplifier along with a DAC, amplifier and power supply in their design. That's pretty impressive if you ask me.
The third thing is that I found really cheap PC Oscilloscope software that seemed to work pretty well. I found two good sources, but ended up going with Visual Analyzer because it's frequency counter was more accurate, and it had a built in function generator.
In my next post, the buffer itself. For those of you who want to see exactly what I mean by "easily flammable!"
No comments:
Post a Comment